.jpg)
3D Printing
3D printing creates three-dimensional objects and this futuristic printing method is used in many sectors around the world due to its highly versatile method of production and quick prototyping of any object.
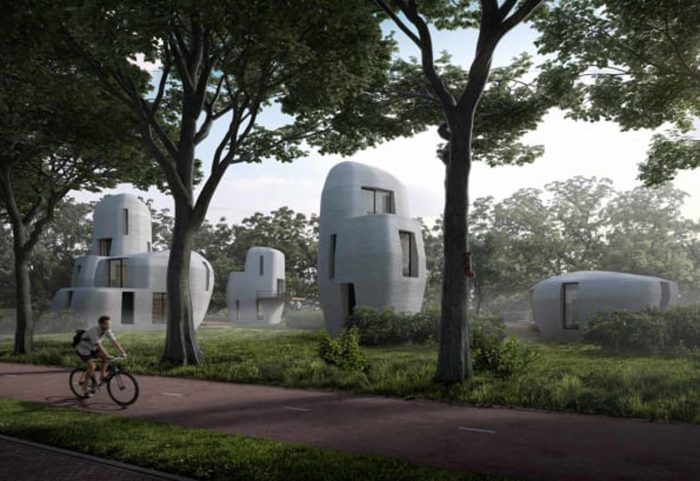
One of the biggest positive changes it has brought is to the construction industry. 3D concrete printing has greatly increased construction productivity, reduced manual labour dependency, and offered architects greater flexibility in designing projects.
In Singapore, 3D concrete printers are used to create concrete components like architectural features and landscape furniture for several Housing Development Board (HDB) estates.
So what exactly is a 3D concrete printer and how does 3D concrete printing work?
The 3D Concrete Printer
A 3D printer can print out an object using different methods, depending on the materials and type of printer used.
In a 3D concrete printer, the nozzle is the most important component that dispenses the mortar used for the printing. There are other materials that 3D printers can use as well, such as Acrylonitrile Butadiene Styrene (ABS), carbon fibre filaments, and wood filaments.
How 3D Concrete Printing Works
Step 1 (Designing): The object that is to be printed is first designed with great precision using a 3D Computer-Aided Design (CAD) modelling software. Common software includes Sketchup, TinkerCAD, and Fusion360. For complex products like construction components, the models will first be extensively tested in simulation to prevent any defects in the final product.
Step 2 (Slicing): Next, the model is broken down into many layers with a slicing software such as Astroprint. This slicing process has to take place because the 3D printer cannot conceptualise a 3D model. The slicing software also tells the printer where to fill the lattices and add support columns for extra stability. After the model is fully sliced, each layer of the model is scanned and the data is sent to the 3D printer.
Step 3 (Setting-Up): The 3D concrete printer and its components are readied, such as refilling the mortar and other consumables the printer will use. The machine is then checked and switched on for printing.
Step 4 (Printing): A 3D concrete printer acts the same way as a traditional inkjet printer. Its nozzle moves up and down as well as back and forth to dispense the mortar. The old layer of mortar is dried before the printer continues to repeat the process on a new layer. It will essentially add thousands of layers on top of one another to create the 3D object. This process will take weeks for detailed and big objects such as benches and pavilions.
Step 5 (Checking): The final completed object will be checked and tested for any defects before being deemed safe for use.
In summary, the 3D concrete printer’s method is similar to the traditional 2D inkjet printing. A layering method is used to create the object. Working from the bottom-up, the 3D printer piles on the concrete layer by layer till the object is completely built. This 3D-printed object is then checked and tested before usage.
About the Author
This article is written by Weber Saint-Gobain
Read the original post here.